Collection Type
Creating a new collection type
Let's start by creating a new collection type to manage book data. In the administration panel select the link Content-Types Builder from the left-side navigation menu. You should then see a list of already existing collection types:

Click on the link Create new collection type to start creating a new one. You should then be able to see the Create a collection type form:

In input field Display name you need to enter the name of the new collection type, e.g. Book. You can then click on the button Continue which will redirect you to the the view were you can start adding fields to your collection type:

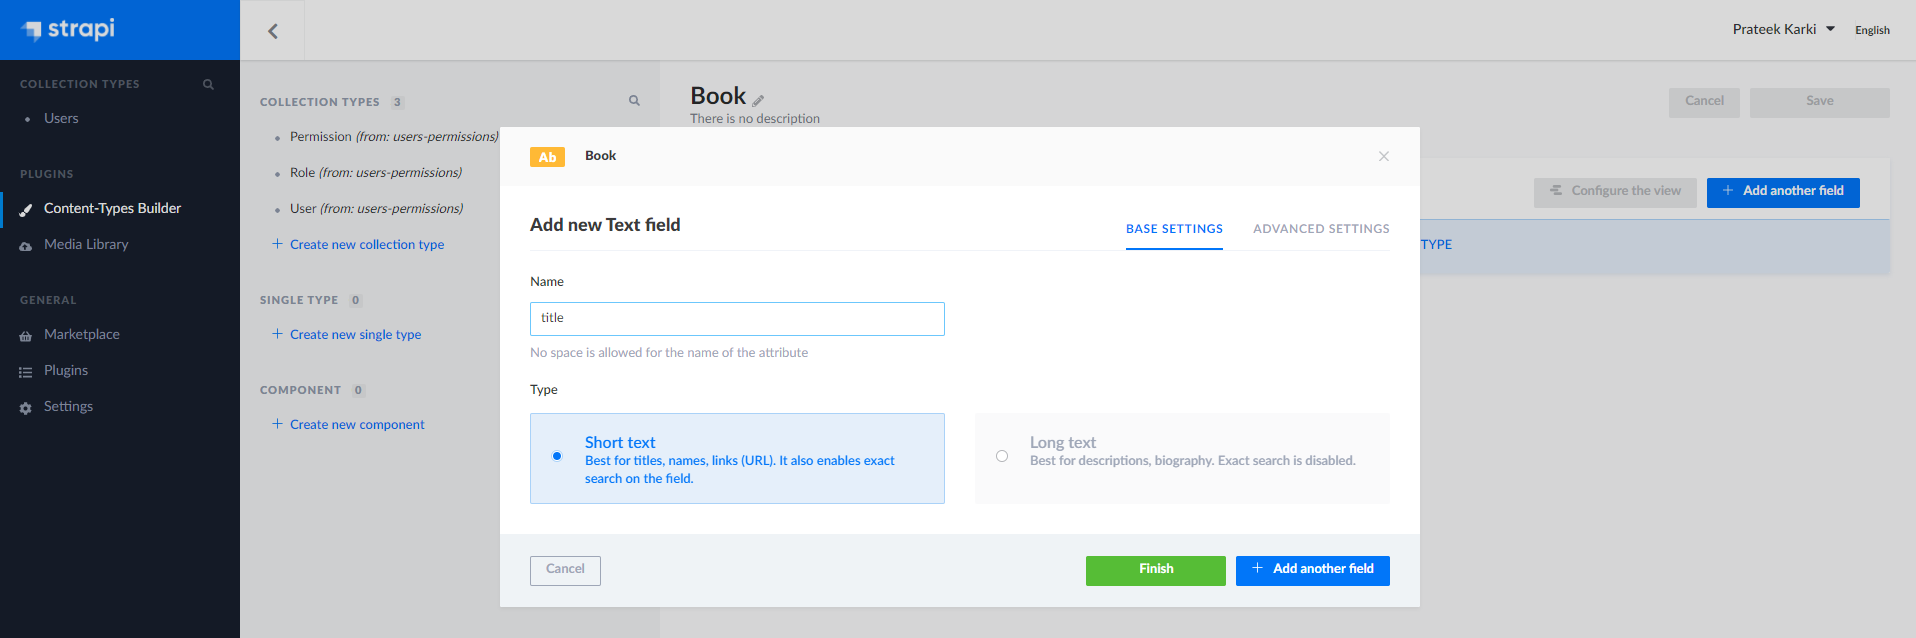
Here you can select from a list of available data types to add new fields to the collection. For the first field to add select data type Text and then specify the name of the new field in the next screen:
You can also click on the advanced settings tab on top-right to add some validation rules as seen below

For the Book collection type add the following data field:
- title (of type Text)
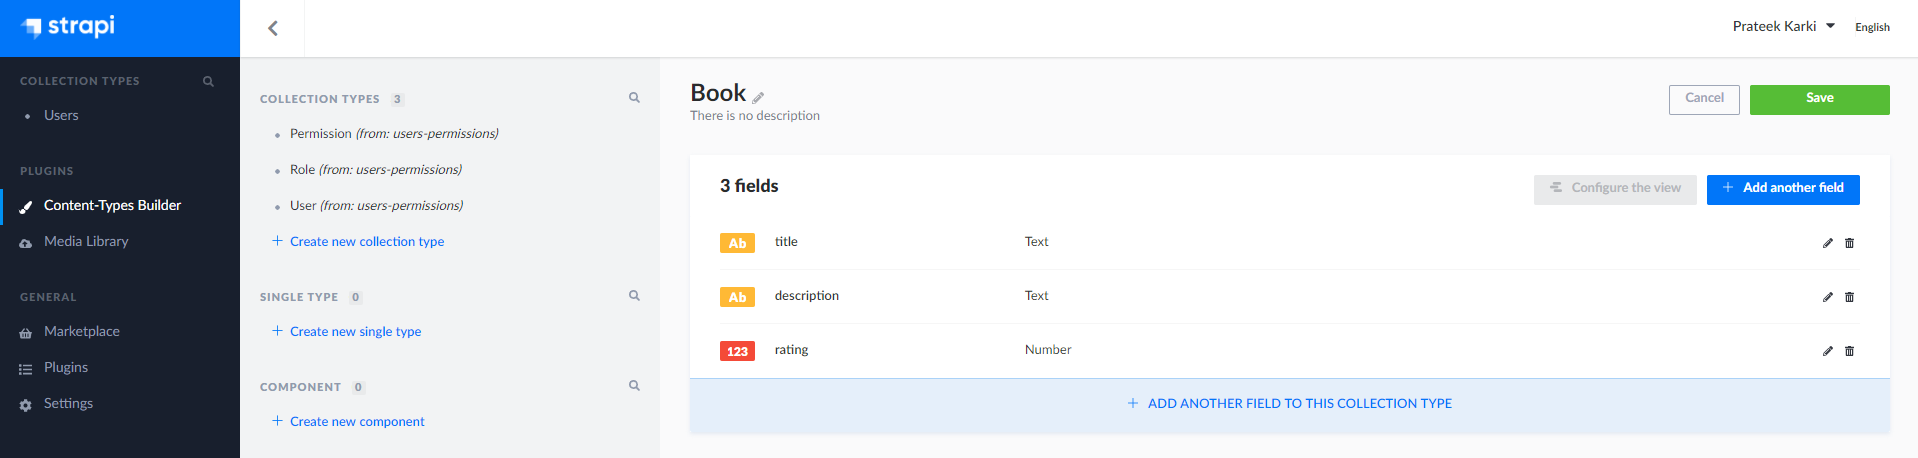
- description (of type Text)
- rating (of type Number)
The collection type view should then look like what you can see in the following screenshot:
Click on the Save button. This will create the collection type and will also restart the server with the new collection type.
Creating Content
When you add new data to a collection type, Strapi automatically provides you with a data entry form that includes all the fields you've defined for that collection type. This form is dynamically generated based on your schema, so you'll only see the fields you've configured.
For our Book collection type, you'll see a form with three fields:
- Title: A text input field for the book's title
- Description: A text area for the book's description
- Rating: A number input field for the book's rating
Step-by-Step Content Creation
- Navigate to Content Manager: In the left sidebar, click on "Content Manager"
- Select Collection Type: Choose "Book" from the dropdown menu
- Add New Entry: Click the "+ Create new entry" button
- Fill in the Form:
- Enter a book title (e.g., "The Great Gatsby")
- Write a description (e.g., "A classic American novel about the Jazz Age")
- Set a rating (e.g., 4.5)
- Save the Entry: Click "Save" to store your first book entry
- Publish: Click "Publish" to make it available via the API
Repeat this process to create 3-4 sample books so you have enough data to test with.
Testing the REST API
Now that we've added data to our collection types, we're ready to test the REST API that Strapi automatically generates. Strapi creates several endpoints for each collection type:
GET /api/books- Retrieve all booksGET /api/books/:id- Retrieve a specific book by IDPOST /api/books- Create a new bookPUT /api/books/:id- Update an existing bookDELETE /api/books/:id- Delete a book
Testing the GET Endpoint
Let's test the main endpoint by opening your browser and navigating to:
http://localhost:1337/api/books
Expected Result: You should see a JSON response with all your book data.
Actual Result: You'll likely get an HTTP 403 Forbidden error, which means the endpoint is not accessible.
Understanding the 403 Error
The 403 error occurs because Strapi has a built-in security system that requires explicit permission configuration. By default, all API endpoints are locked down for security reasons.
Why This Happens
Strapi uses a role-based access control (RBAC) system where:
- Public Role: Applies to unauthenticated requests (like visiting the URL in your browser)
- Authenticated Role: Applies to requests with valid authentication tokens
- Default Behavior: Both roles start with no permissions, so all endpoints return 403
Fixing the Permissions
To resolve this issue, we need to configure the permissions for the Public role to allow reading book data.
Step-by-Step Permission Setup
-
Open Roles & Permissions: In the left sidebar, click on "Settings" → "Users & Permissions Plugin" → "Roles"
-
Select Public Role: Click on the "Public" role (this handles unauthenticated requests)
-
Configure Book Permissions: In the permissions section, find "Book" and enable these permissions:
- ✅ count - Allows counting total books
- ✅ find - Allows retrieving all books (covers GET /api/books)
- ✅ findOne - Allows retrieving individual books (covers GET /api/books/:id)
-
Save Changes: Click "Save" to apply the new permissions
What Each Permission Does
- count: Enables the
/api/books/countendpoint for getting total book count - find: Enables the
/api/booksendpoint for retrieving all books - findOne: Enables the
/api/books/:idendpoint for retrieving specific books
Testing the Fixed API
After saving the permissions, test the endpoint again by refreshing your browser at:
http://localhost:1337/api/books
Expected Result: You should now see a successful JSON response containing all your book data, similar to this:
{
  "data": [
    {
      "id": 1,
      "attributes": {
        "title": "The Great Gatsby",
        "description": "A classic American novel about the Jazz Age",
        "rating": 4.5,
        "createdAt": "2023-01-15T10:30:00.000Z",
        "updatedAt": "2023-01-15T10:30:00.000Z"
      }
    }
  ],
  "meta": {
    "pagination": {
      "page": 1,
      "pageSize": 25,
      "pageCount": 1,
      "total": 1
    }
  }
}
Success! The API is now working correctly, and you can access your book data programmatically from your frontend applications.